Teamwork in Fourdeck: roles, permissions and invites
· 4 min read
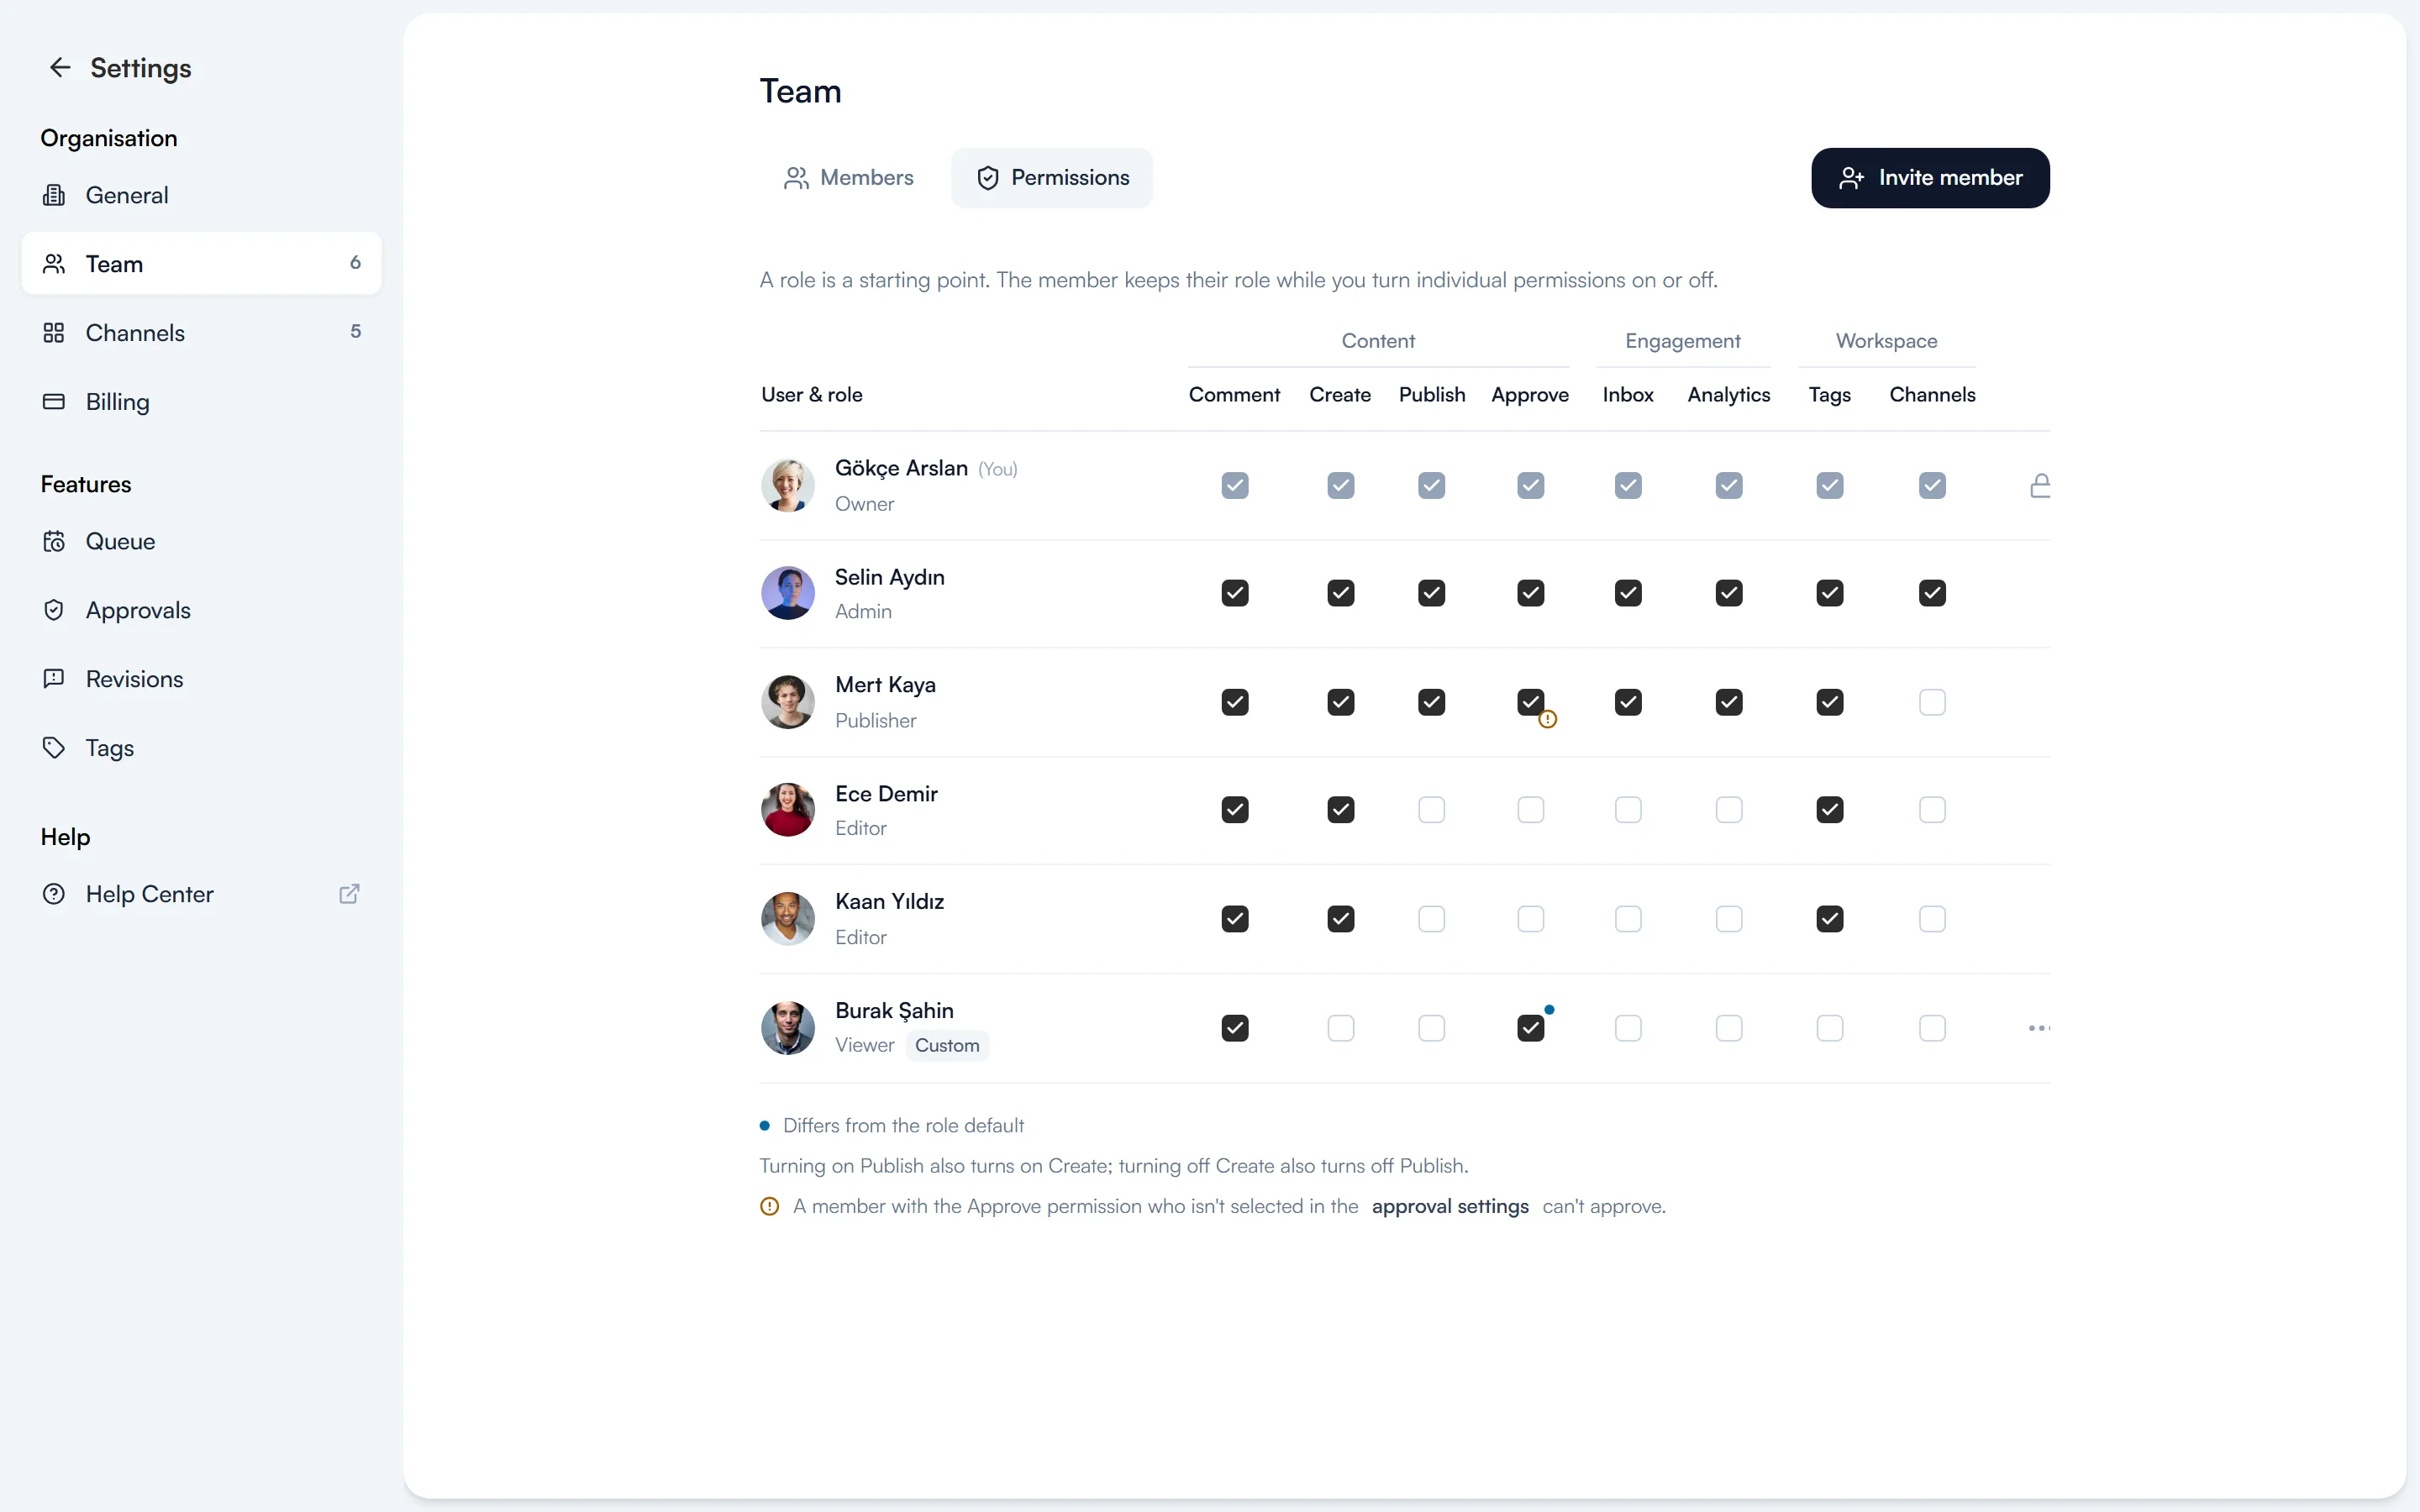
In Fourdeck, a team is set up per workspace. When you invite someone, you give them a role, and the role is a starting point: the person keeps their role while you switch individual permissions on or off. That way your client can only approve, and your intern can draft posts but not publish them. Team features come with the Team plan, with up to 10 people in a workspace.
Roles
The Members tab under Settings → Team lists everyone in the workspace, their role and when they were last seen. You change a role from the drop-down menu there.
| Role | What it does |
|---|---|
| Owner | Full permissions, billing and plan management. |
| Admin | Does everything; manages the team, channels and settings. |
| Publisher | Creates, approves and publishes; uses the inbox and analytics. |
| Editor | Creates drafts and sends them for approval; can't publish. |
| Viewer | Views and comments. |
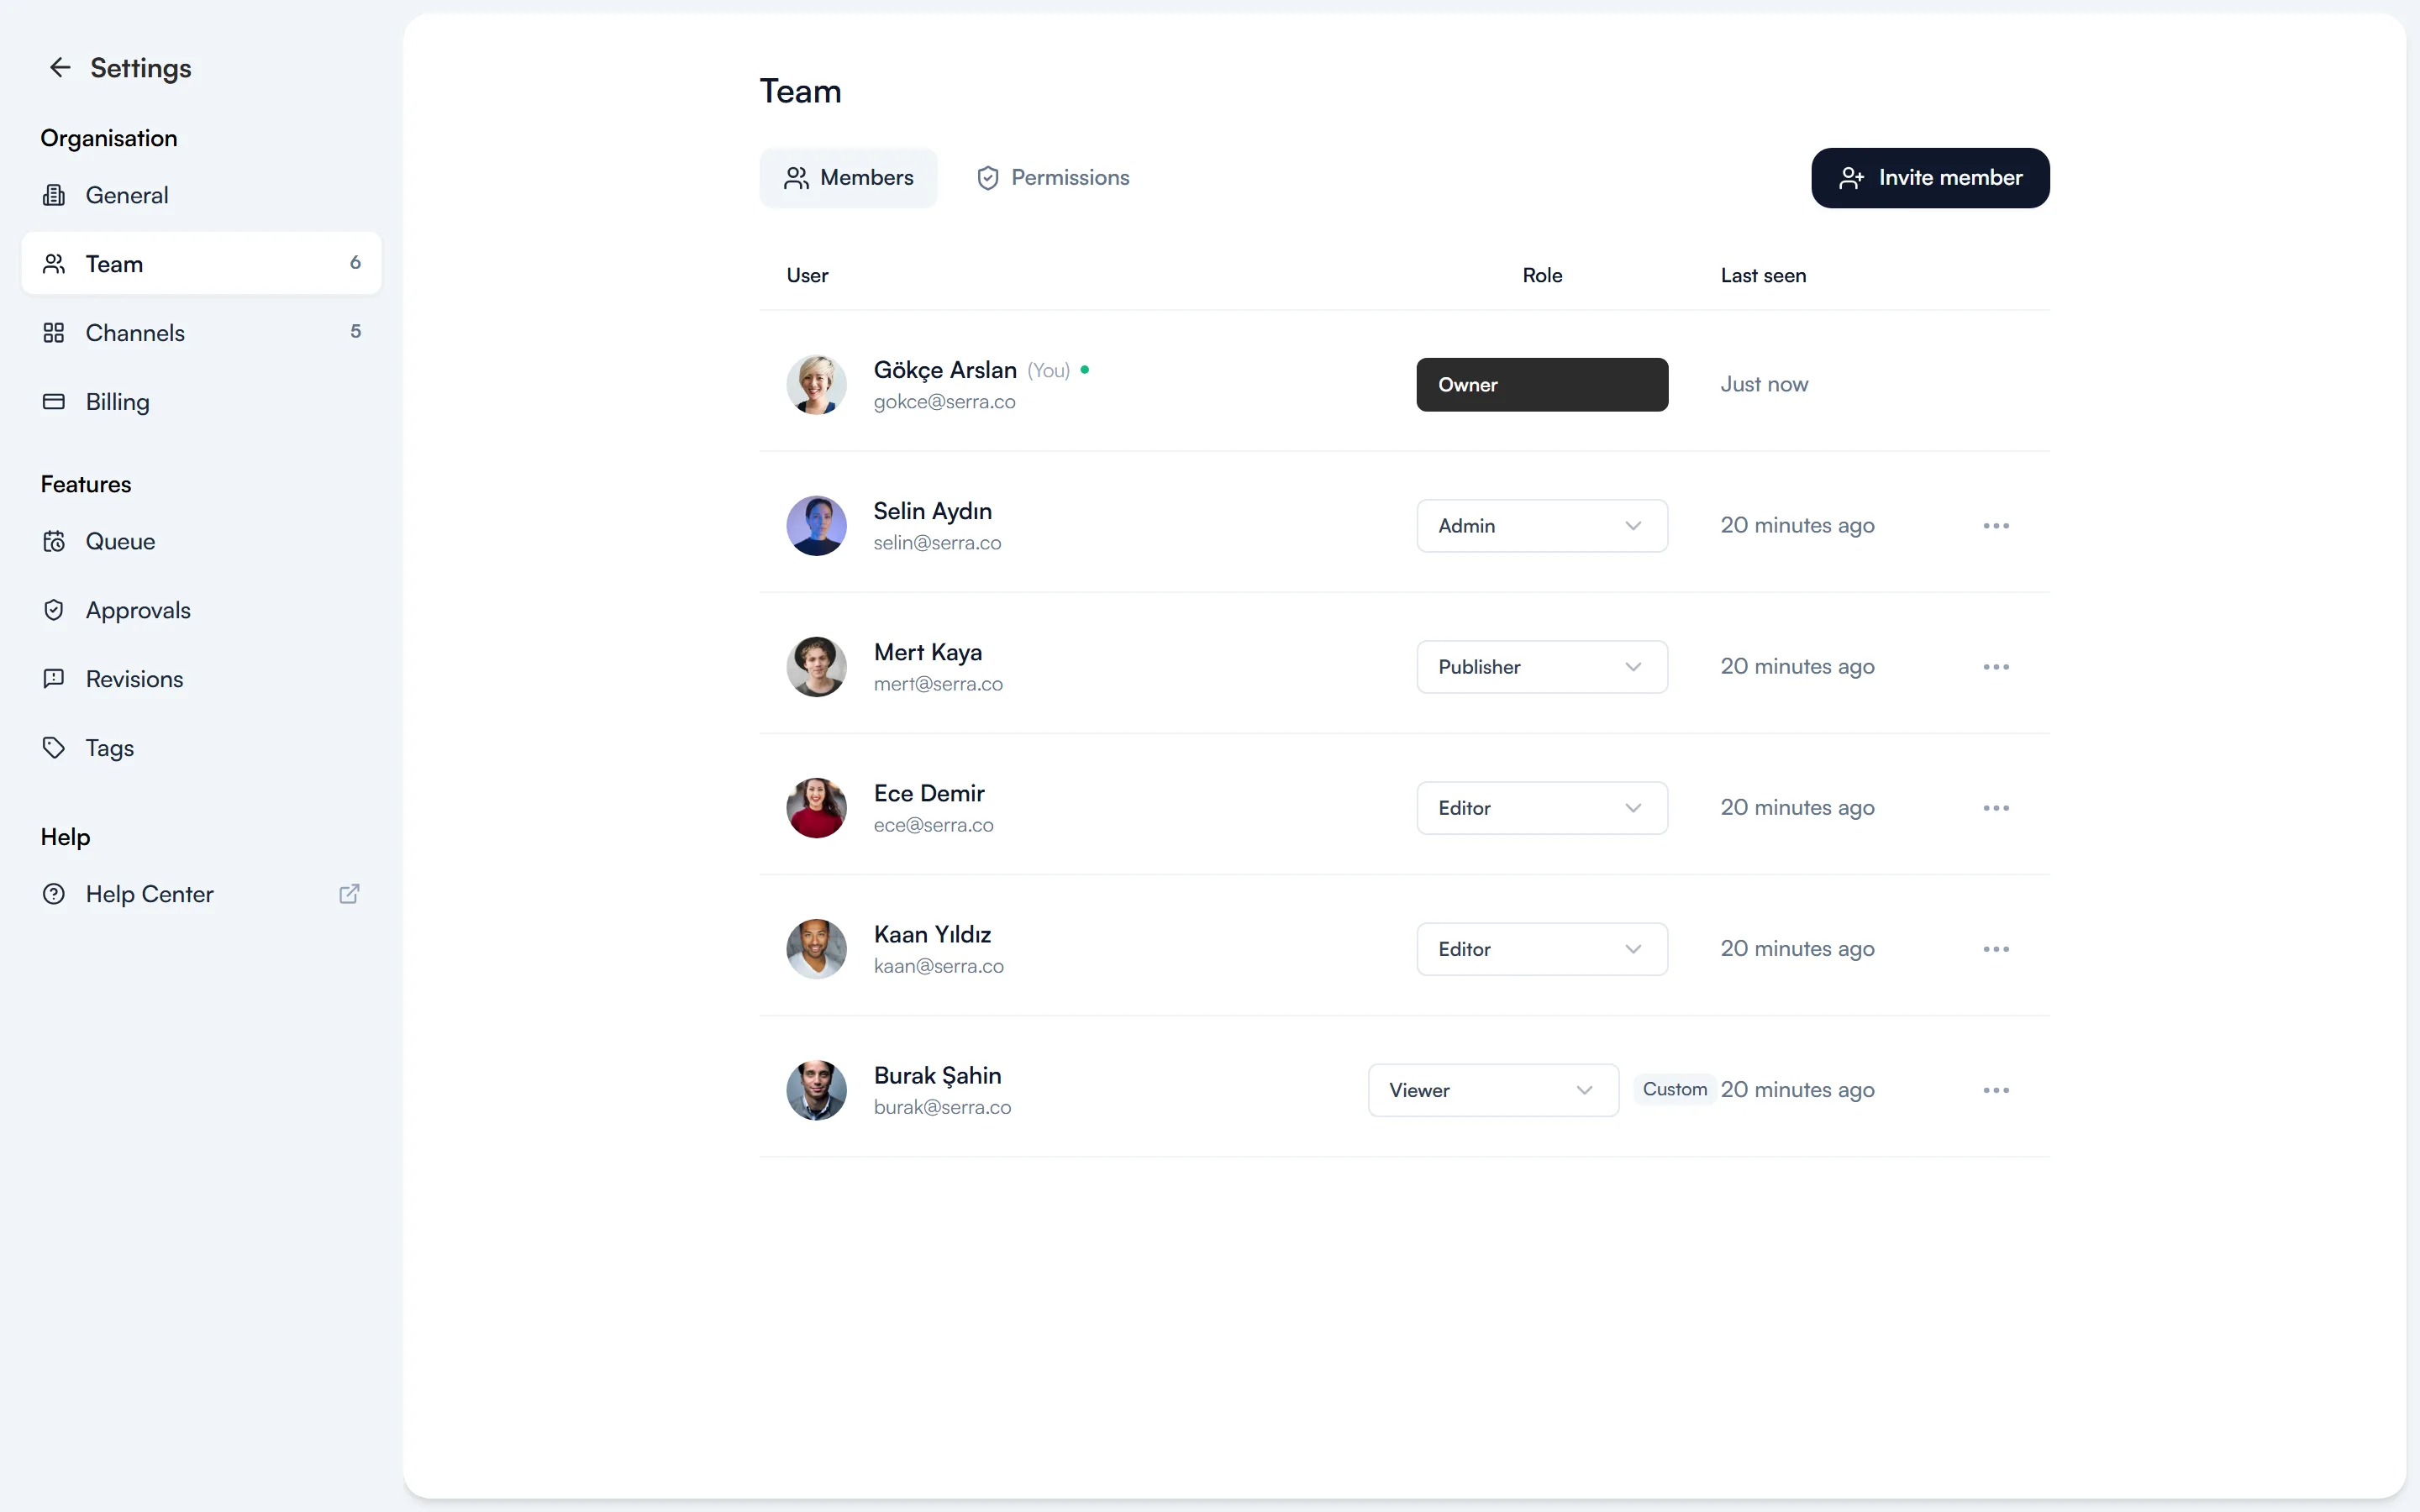
The Owner role can't be given to anyone; it can only be transferred. Only the owner manages billing and the plan, while the owner and admins manage the team.
Set permissions per person
In the Permissions tab, each member's row has eight permissions, grouped in three:
- Content: Comment, Create, Publish, Approve
- Engagement: Inbox, Analytics
- Workspace: Tags, Channels
Ticking or clearing a box doesn't change the person's role, only that permission. Permissions that differ from the role's default get a blue dot, and a “Custom” label appears next to the role name. A few rules:
- Turning on Publish also turns on Create; turning off Create also turns off Publish.
- The owner has every permission, and you can't change your own permissions.
- Only the owner and admins can change permissions.
- A member with the Approve permission also has to be selected as an approver under Settings → Approvals before they can approve.
Invite members
On the Settings → Team page, press “Invite member”. The window that opens gives you two options:
- Invite by email: type the member's email, choose a permission role and press “Send invite”. The person receives an invitation email, and the link in it is valid for 7 days.
- Invite link: choose a role and press “Create invite link”. The link is shown only once, so copy it straight away. Whoever opens it joins the workspace with the role you chose; the link is valid for 7 days.
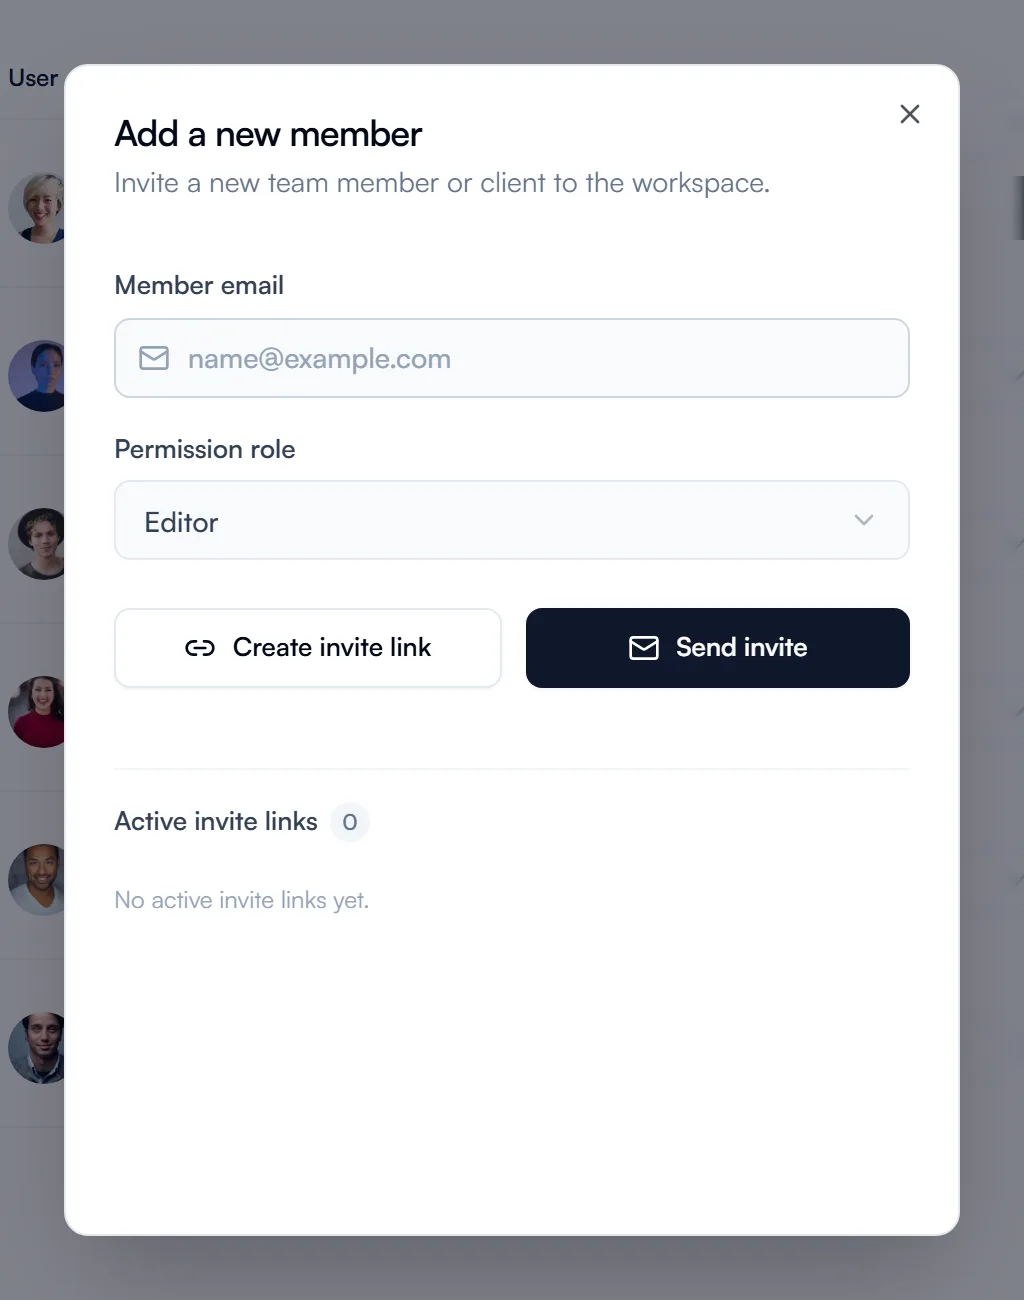
The Active invite links list in the same window shows the open links, and you can delete them when you're done. Share a link only with the people you want to invite.