Content approvals in Fourdeck: how they work and how to set them up
· 5 min read
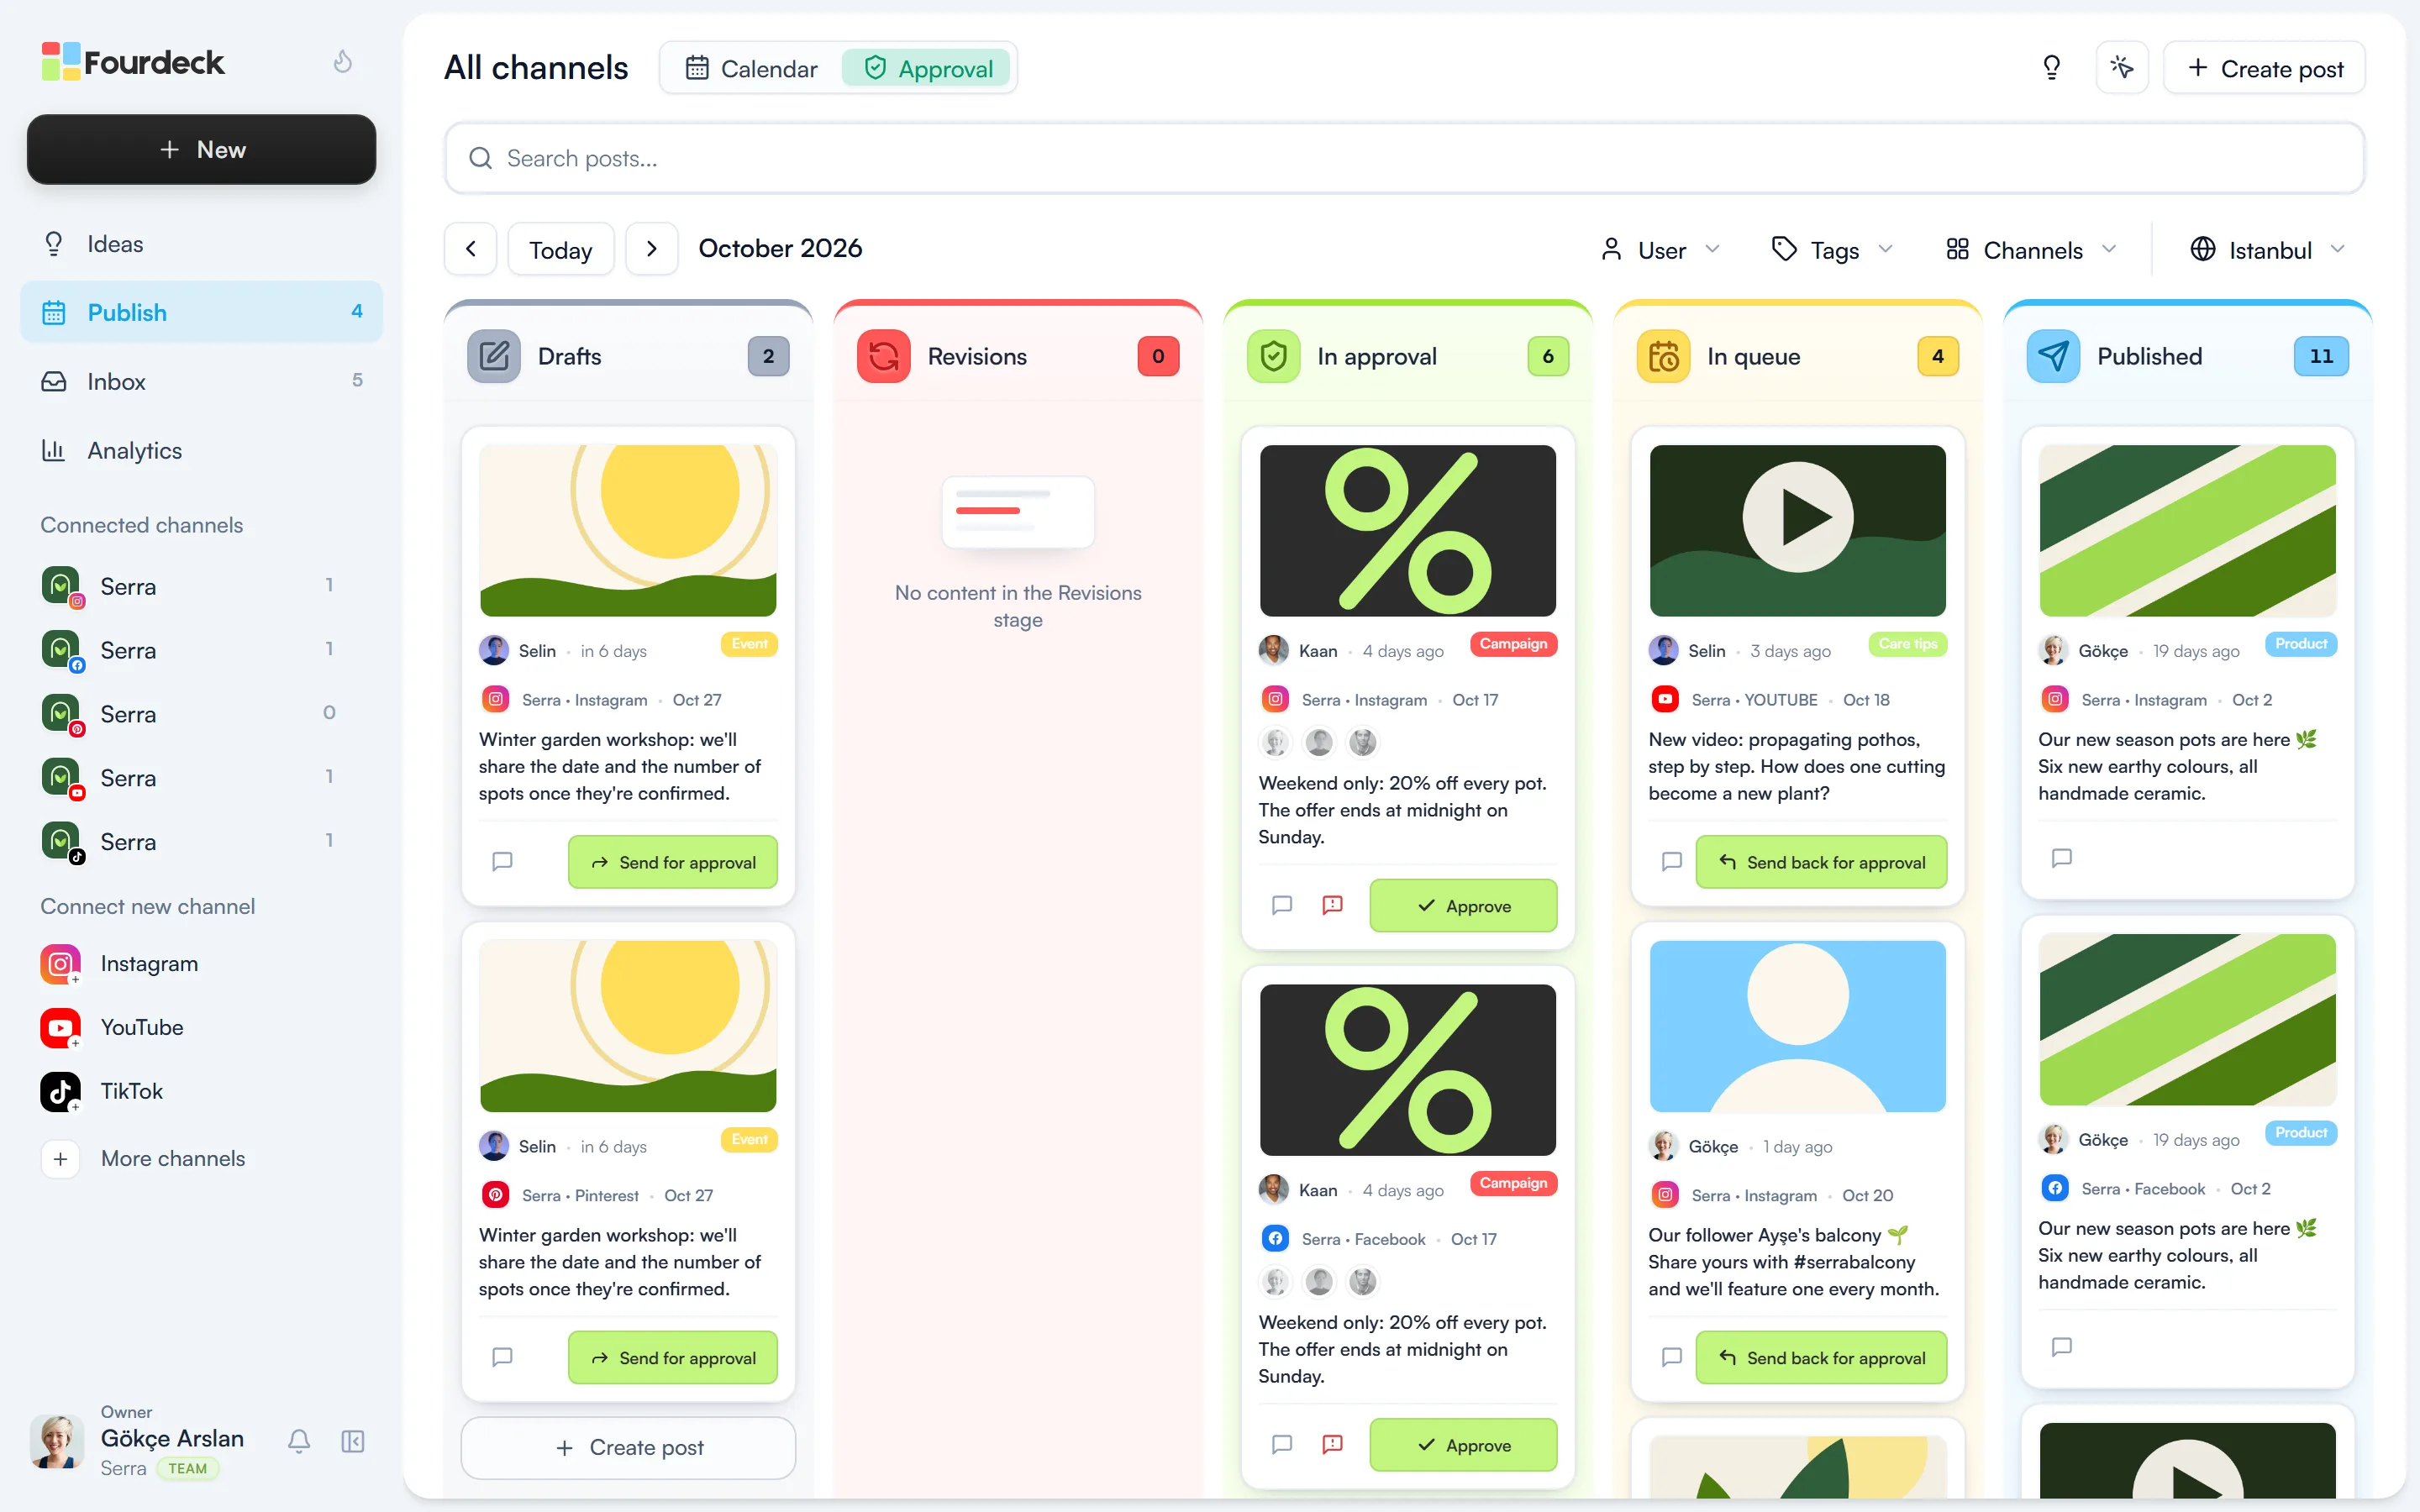
In a workspace with the approval flow on, no post goes live until an authorised person has looked at it. An editor prepares the post and sends it for approval; an approver sees it exactly as it will be published and either approves it or marks what needs to change. Approved posts publish at their scheduled time. This guide covers how to switch the flow on, how to choose who approves, and how the day-to-day work runs on the board.
Where to turn on the approval flow
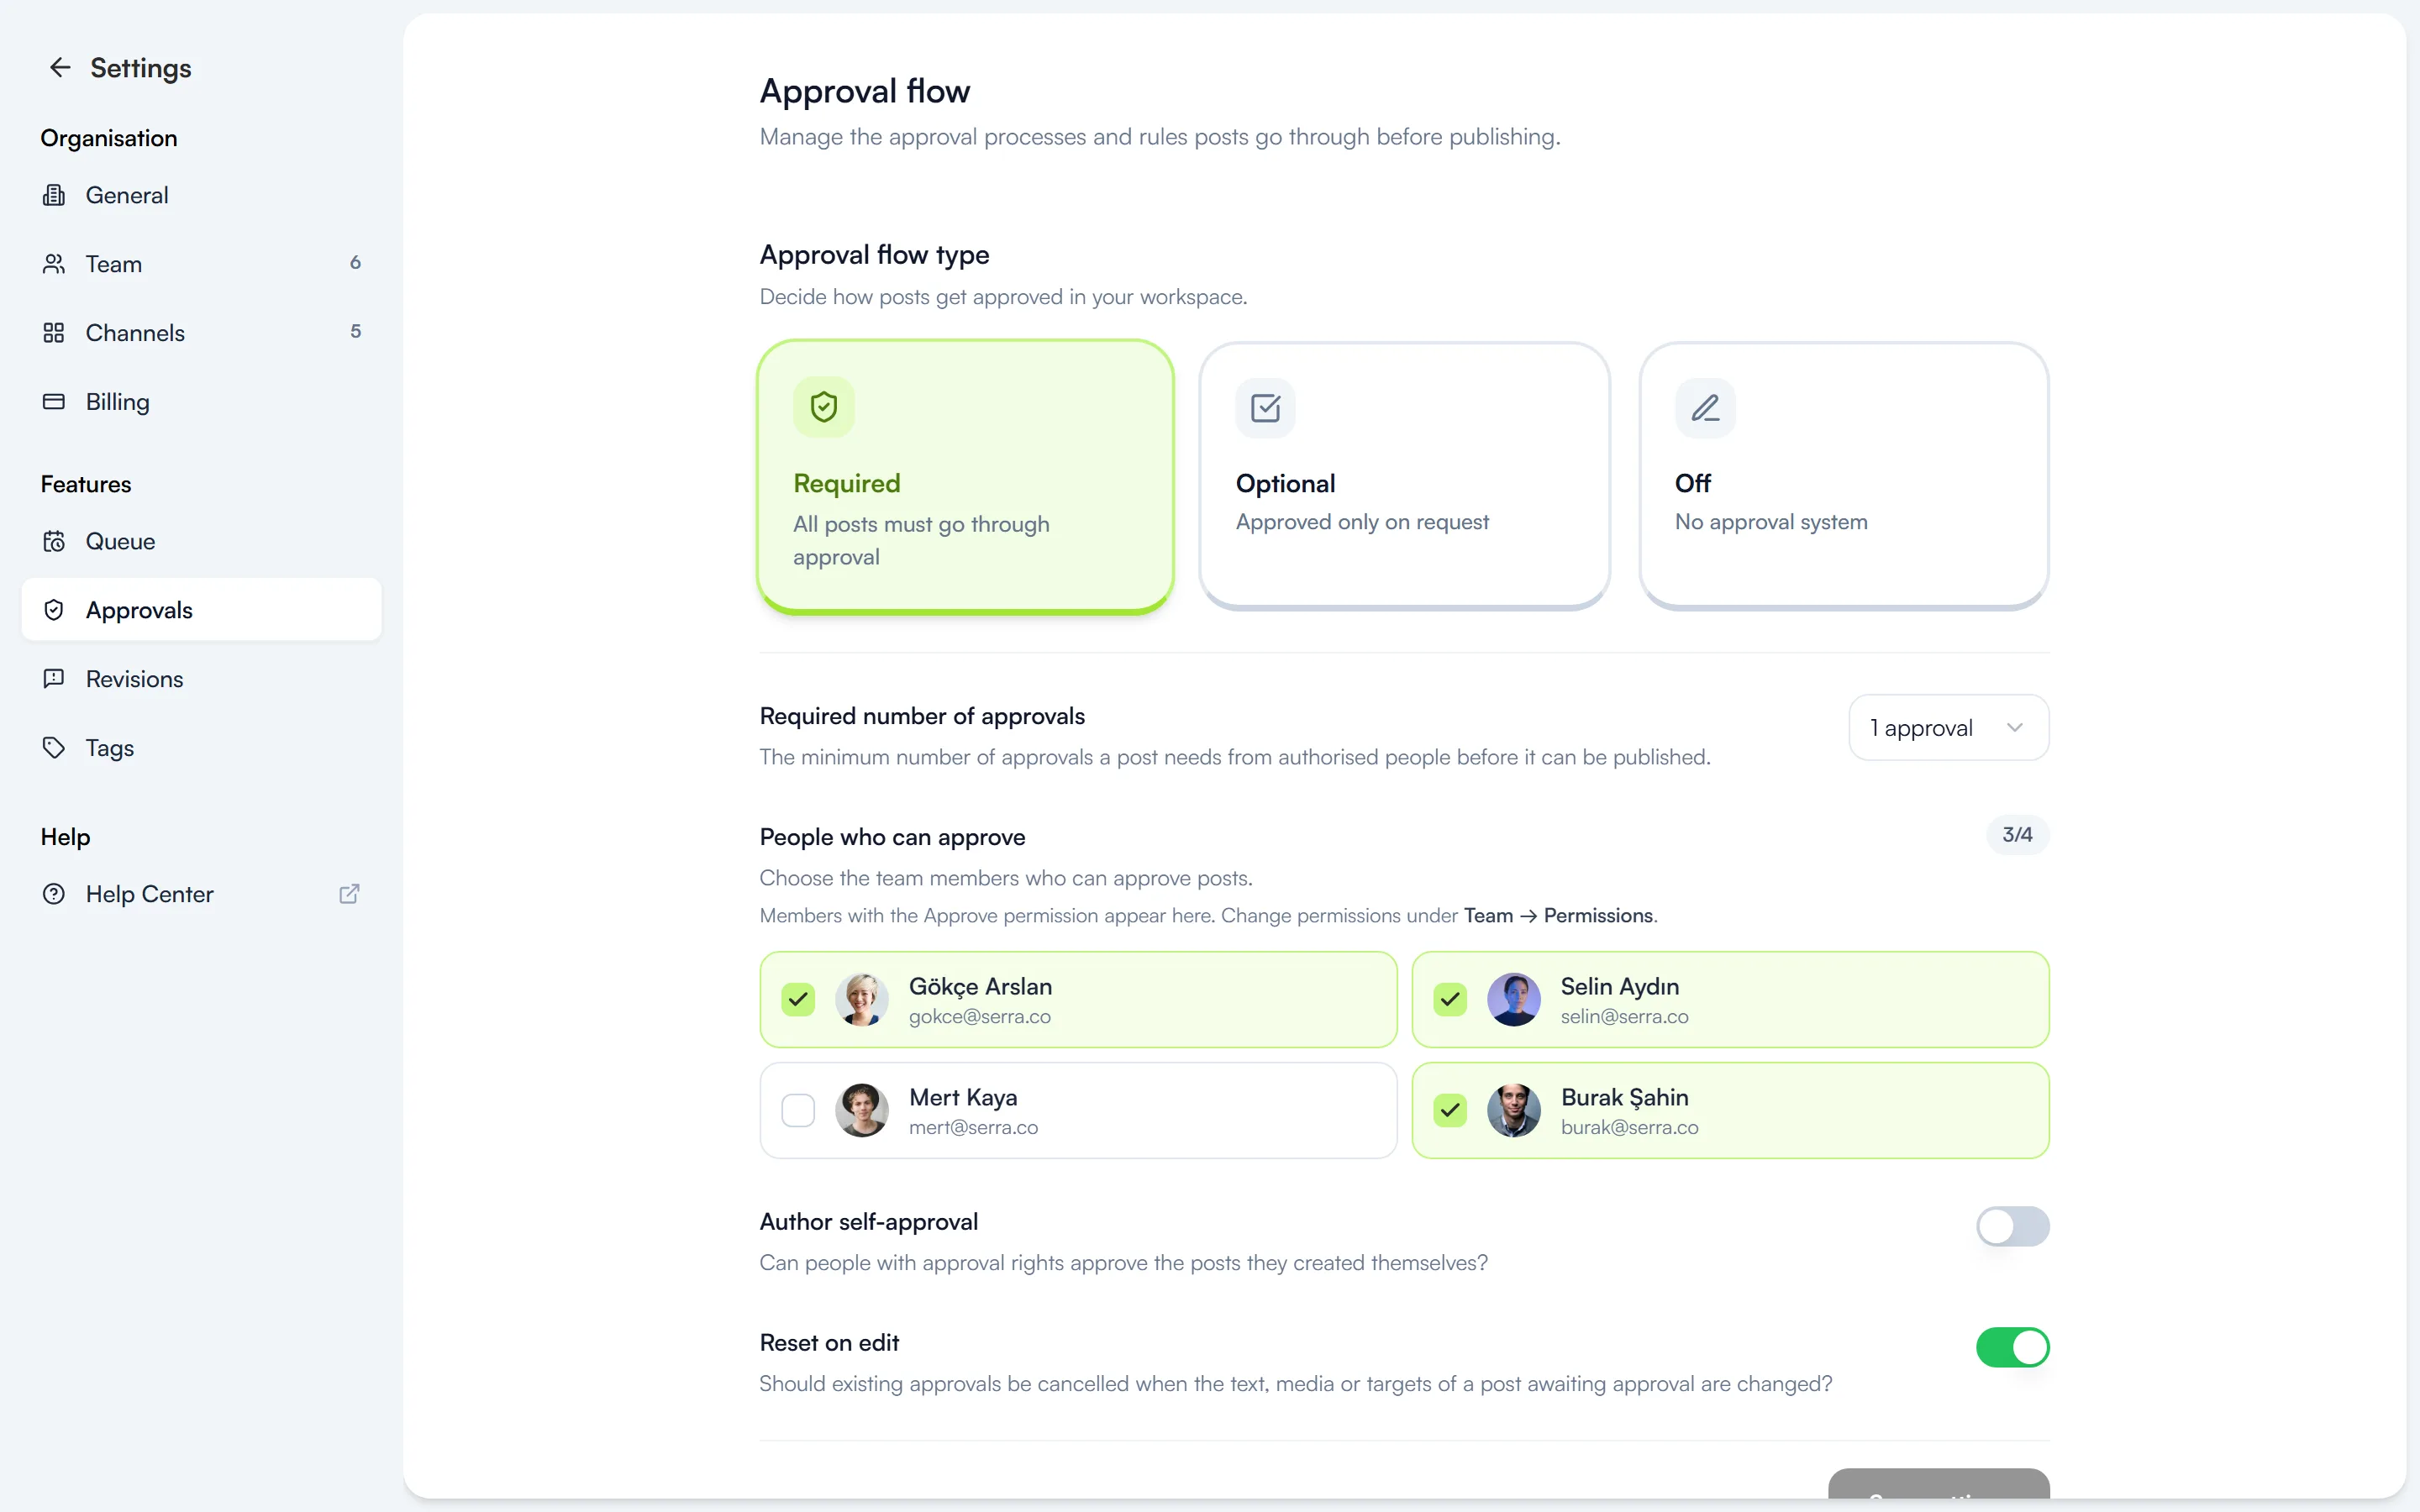
Approval settings live under Settings → Approvals. The approval flow comes with the Team plan, and only the owner and admins can change it. At the top of the page you pick one of three flow types:
- Required: all posts must go through approval. Editors see “Send for approval” instead of a schedule button.
- Optional: posts can be scheduled straight away, and the author can send one for approval when they want a second pair of eyes.
- Off: no approval system is used.
Decide who approves, and how many approvals a post needs
- Required number of approvals: choose how many people must approve a post before it can go live. The maximum is the number of people you can pick as approvers.
- People who can approve: only members with the Approve permission appear here. You grant it under Settings → Team → Permissions; a member who has the permission but isn't ticked in this list can't approve.
- Author self-approval: when it's on, someone with approval rights can approve a post they created themselves. When it's off, somebody else has to review it.
- Reset on edit: when it's on, changing the text, media or target channels of a post awaiting approval cancels the approvals it already has, so it collects them again.
When you're done, press “Save settings”.
Sending a post for approval
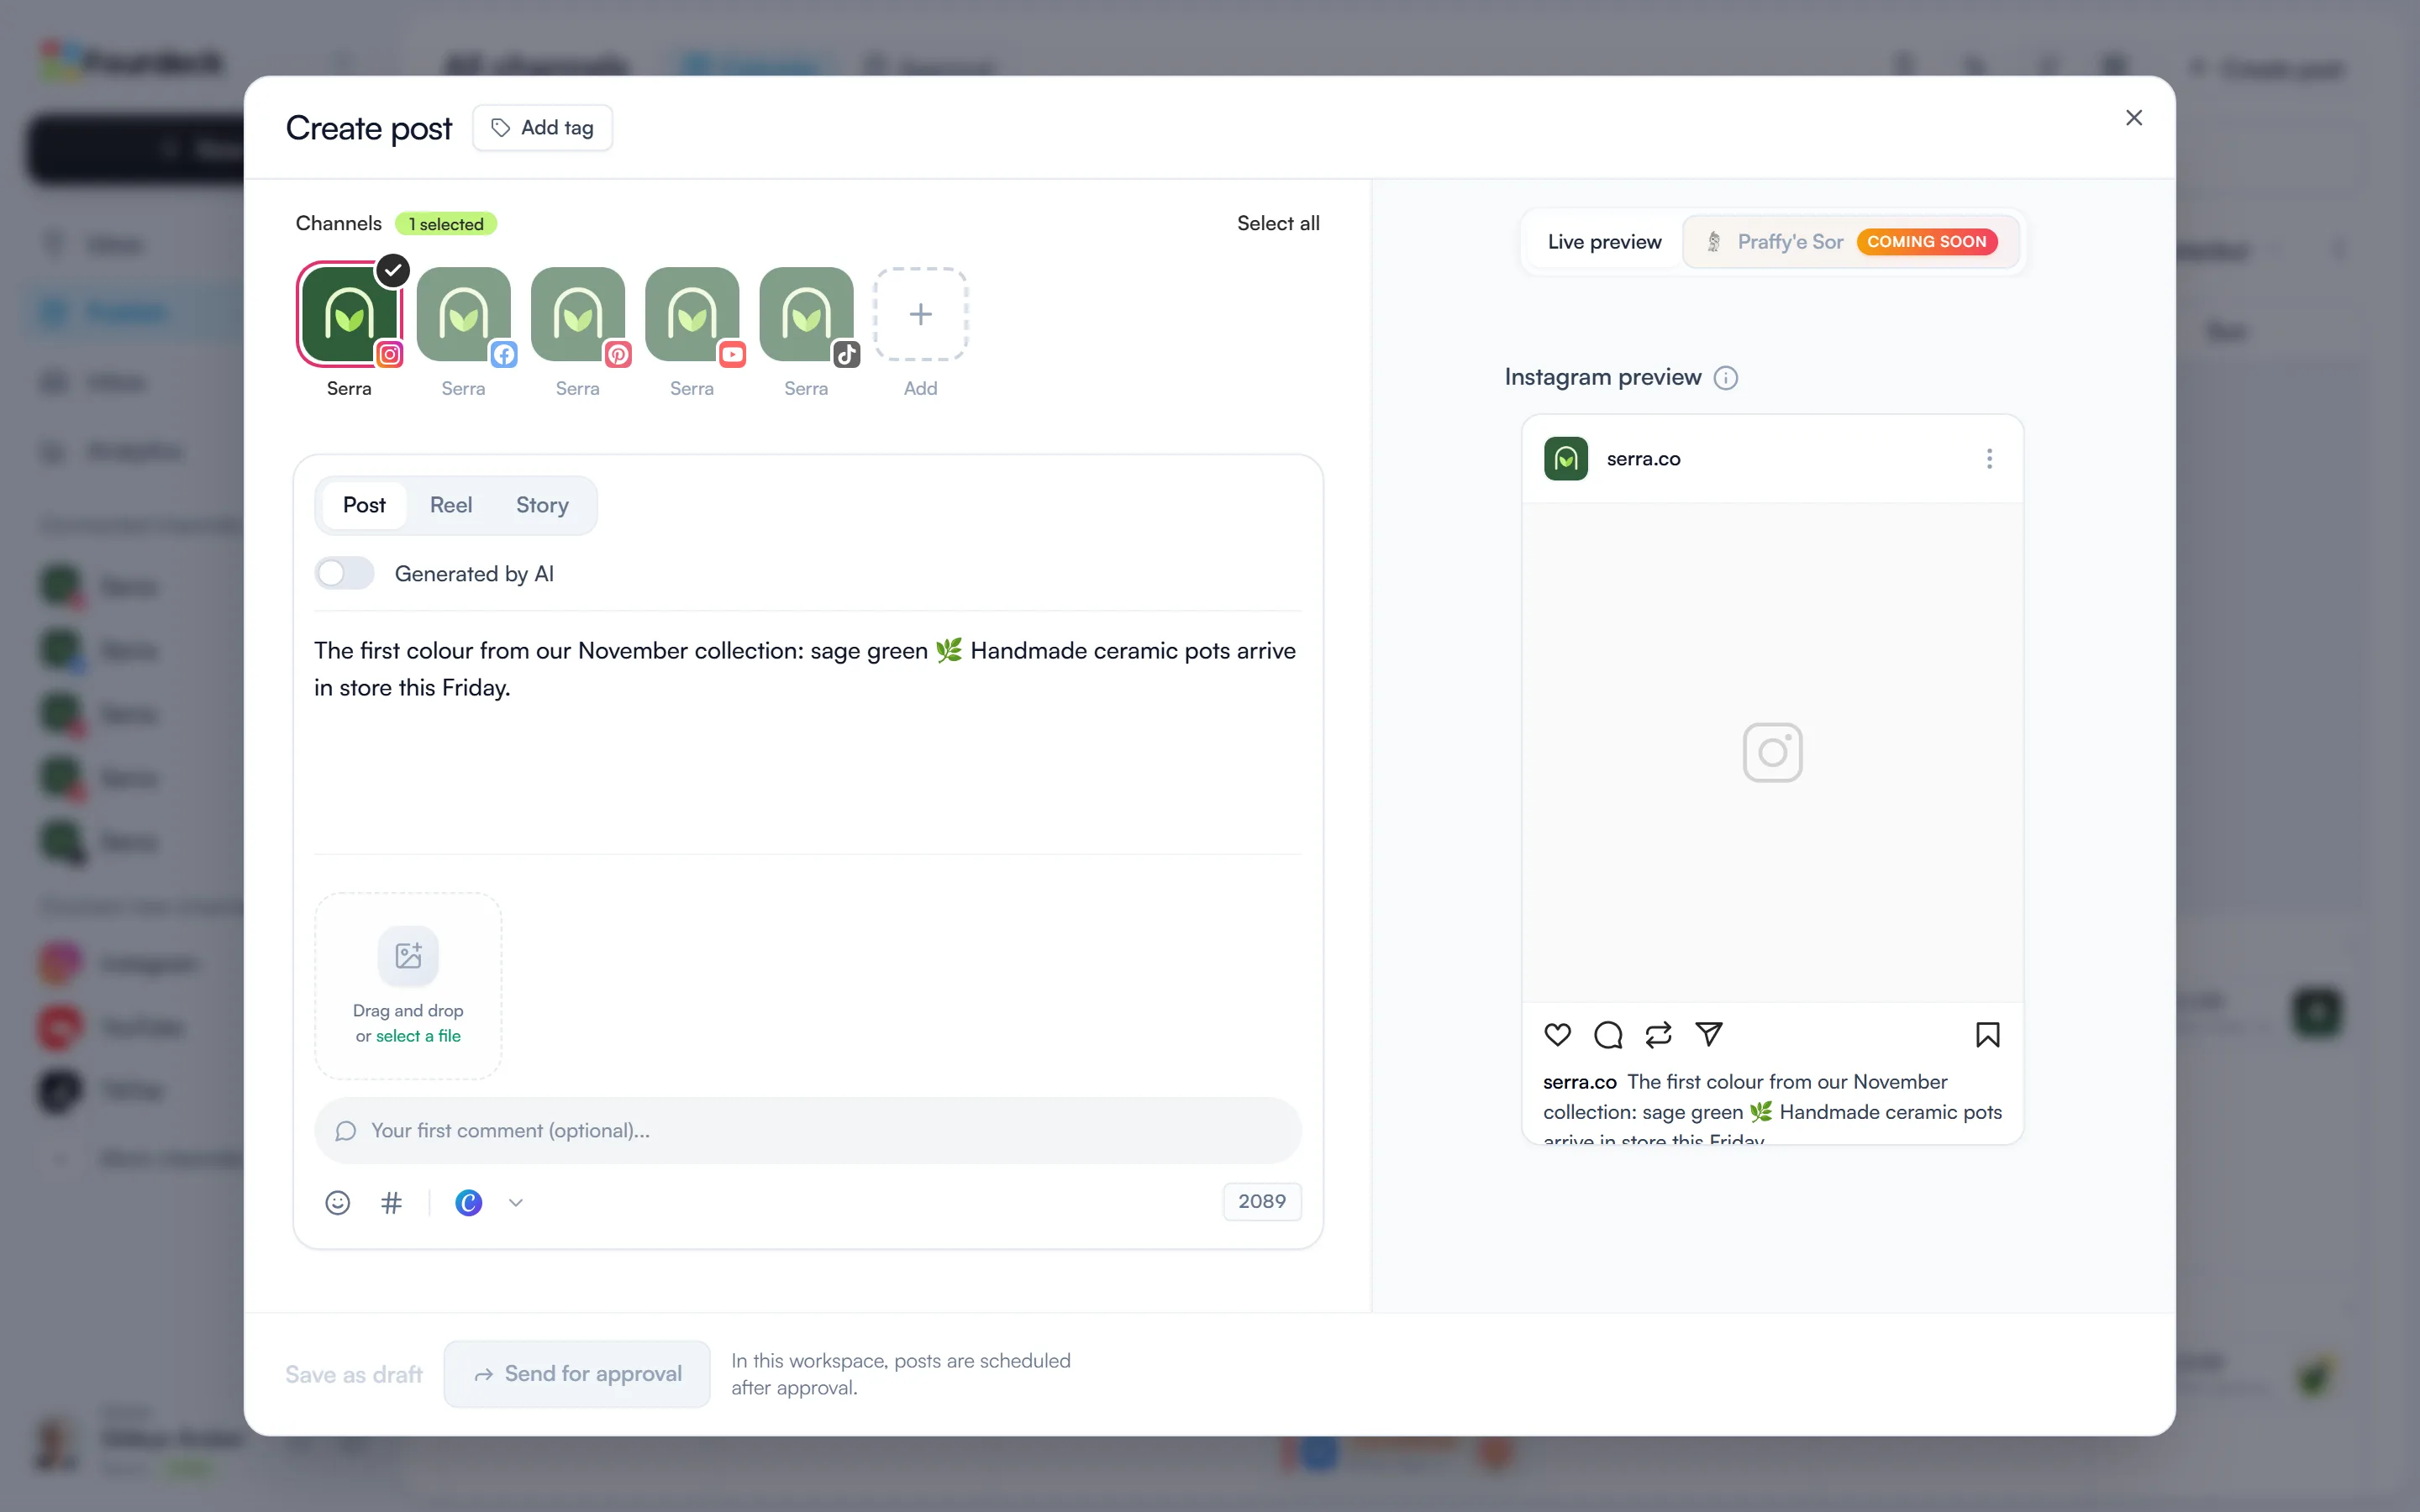
In a workspace where approval is required, the bottom of the post window shows a “Send for approval” button and the note “In this workspace, posts are scheduled after approval.” Pick your channels, add the text and media, set the publish date and send it for approval. A post dated in the past can't be sent for approval, so move the date forward first.
Approvers get a notification when a post is sent to them, and the author is notified when the post is approved.
Day-to-day work on the approval board
The “Approval” tab at the top of the Publish page groups posts into five columns by stage: Drafts, Revisions, In approval, In queue and Published. Cards in the In approval column show the approvers' profile photos and an “Approve” button, so you can approve a short post right from the card.
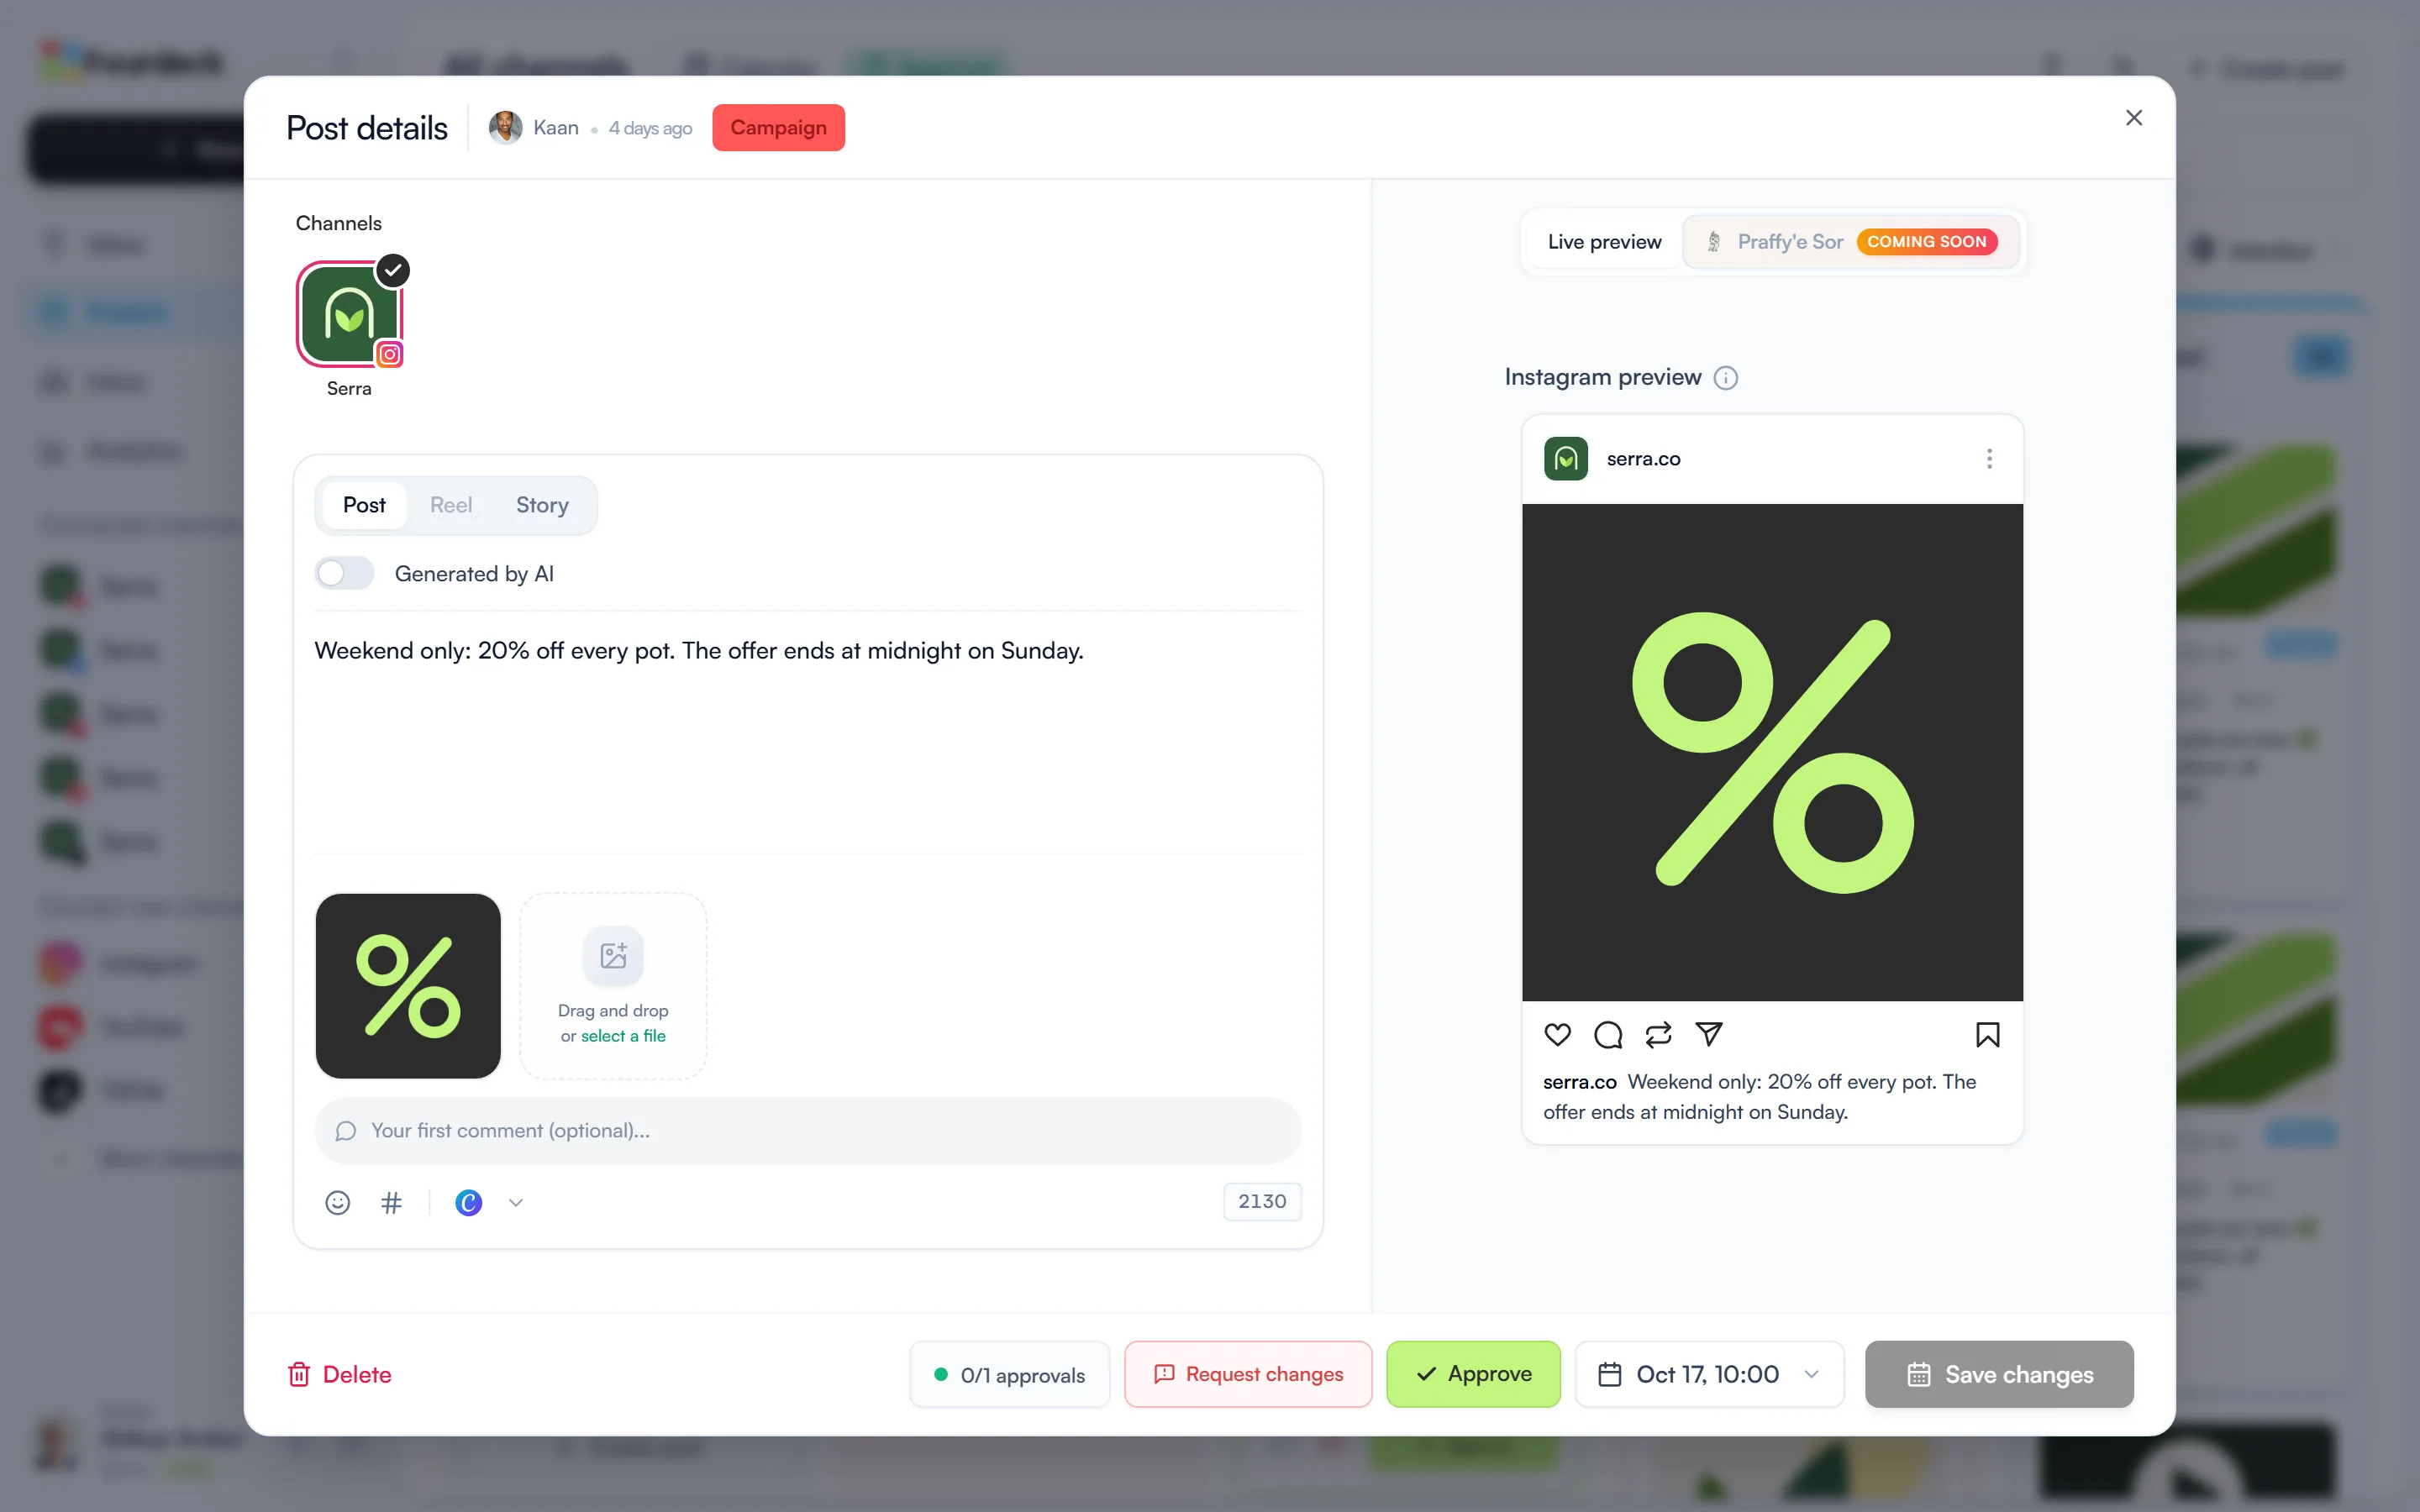
To review a post in detail, click its card. The window that opens shows the channel preview, how many approvals the post has (for example “0/1 approvals”) and two buttons: “Approve” and “Request changes”.
Requesting changes
“Request changes” opens a window. Under “What needs fixing?” pick one or more items, and add an explanatory note on the right if you like. The post moves to the Revisions column. The author sees the requested changes and your note on the card, opens the post with “Edit”, fixes it and sends it for approval again.
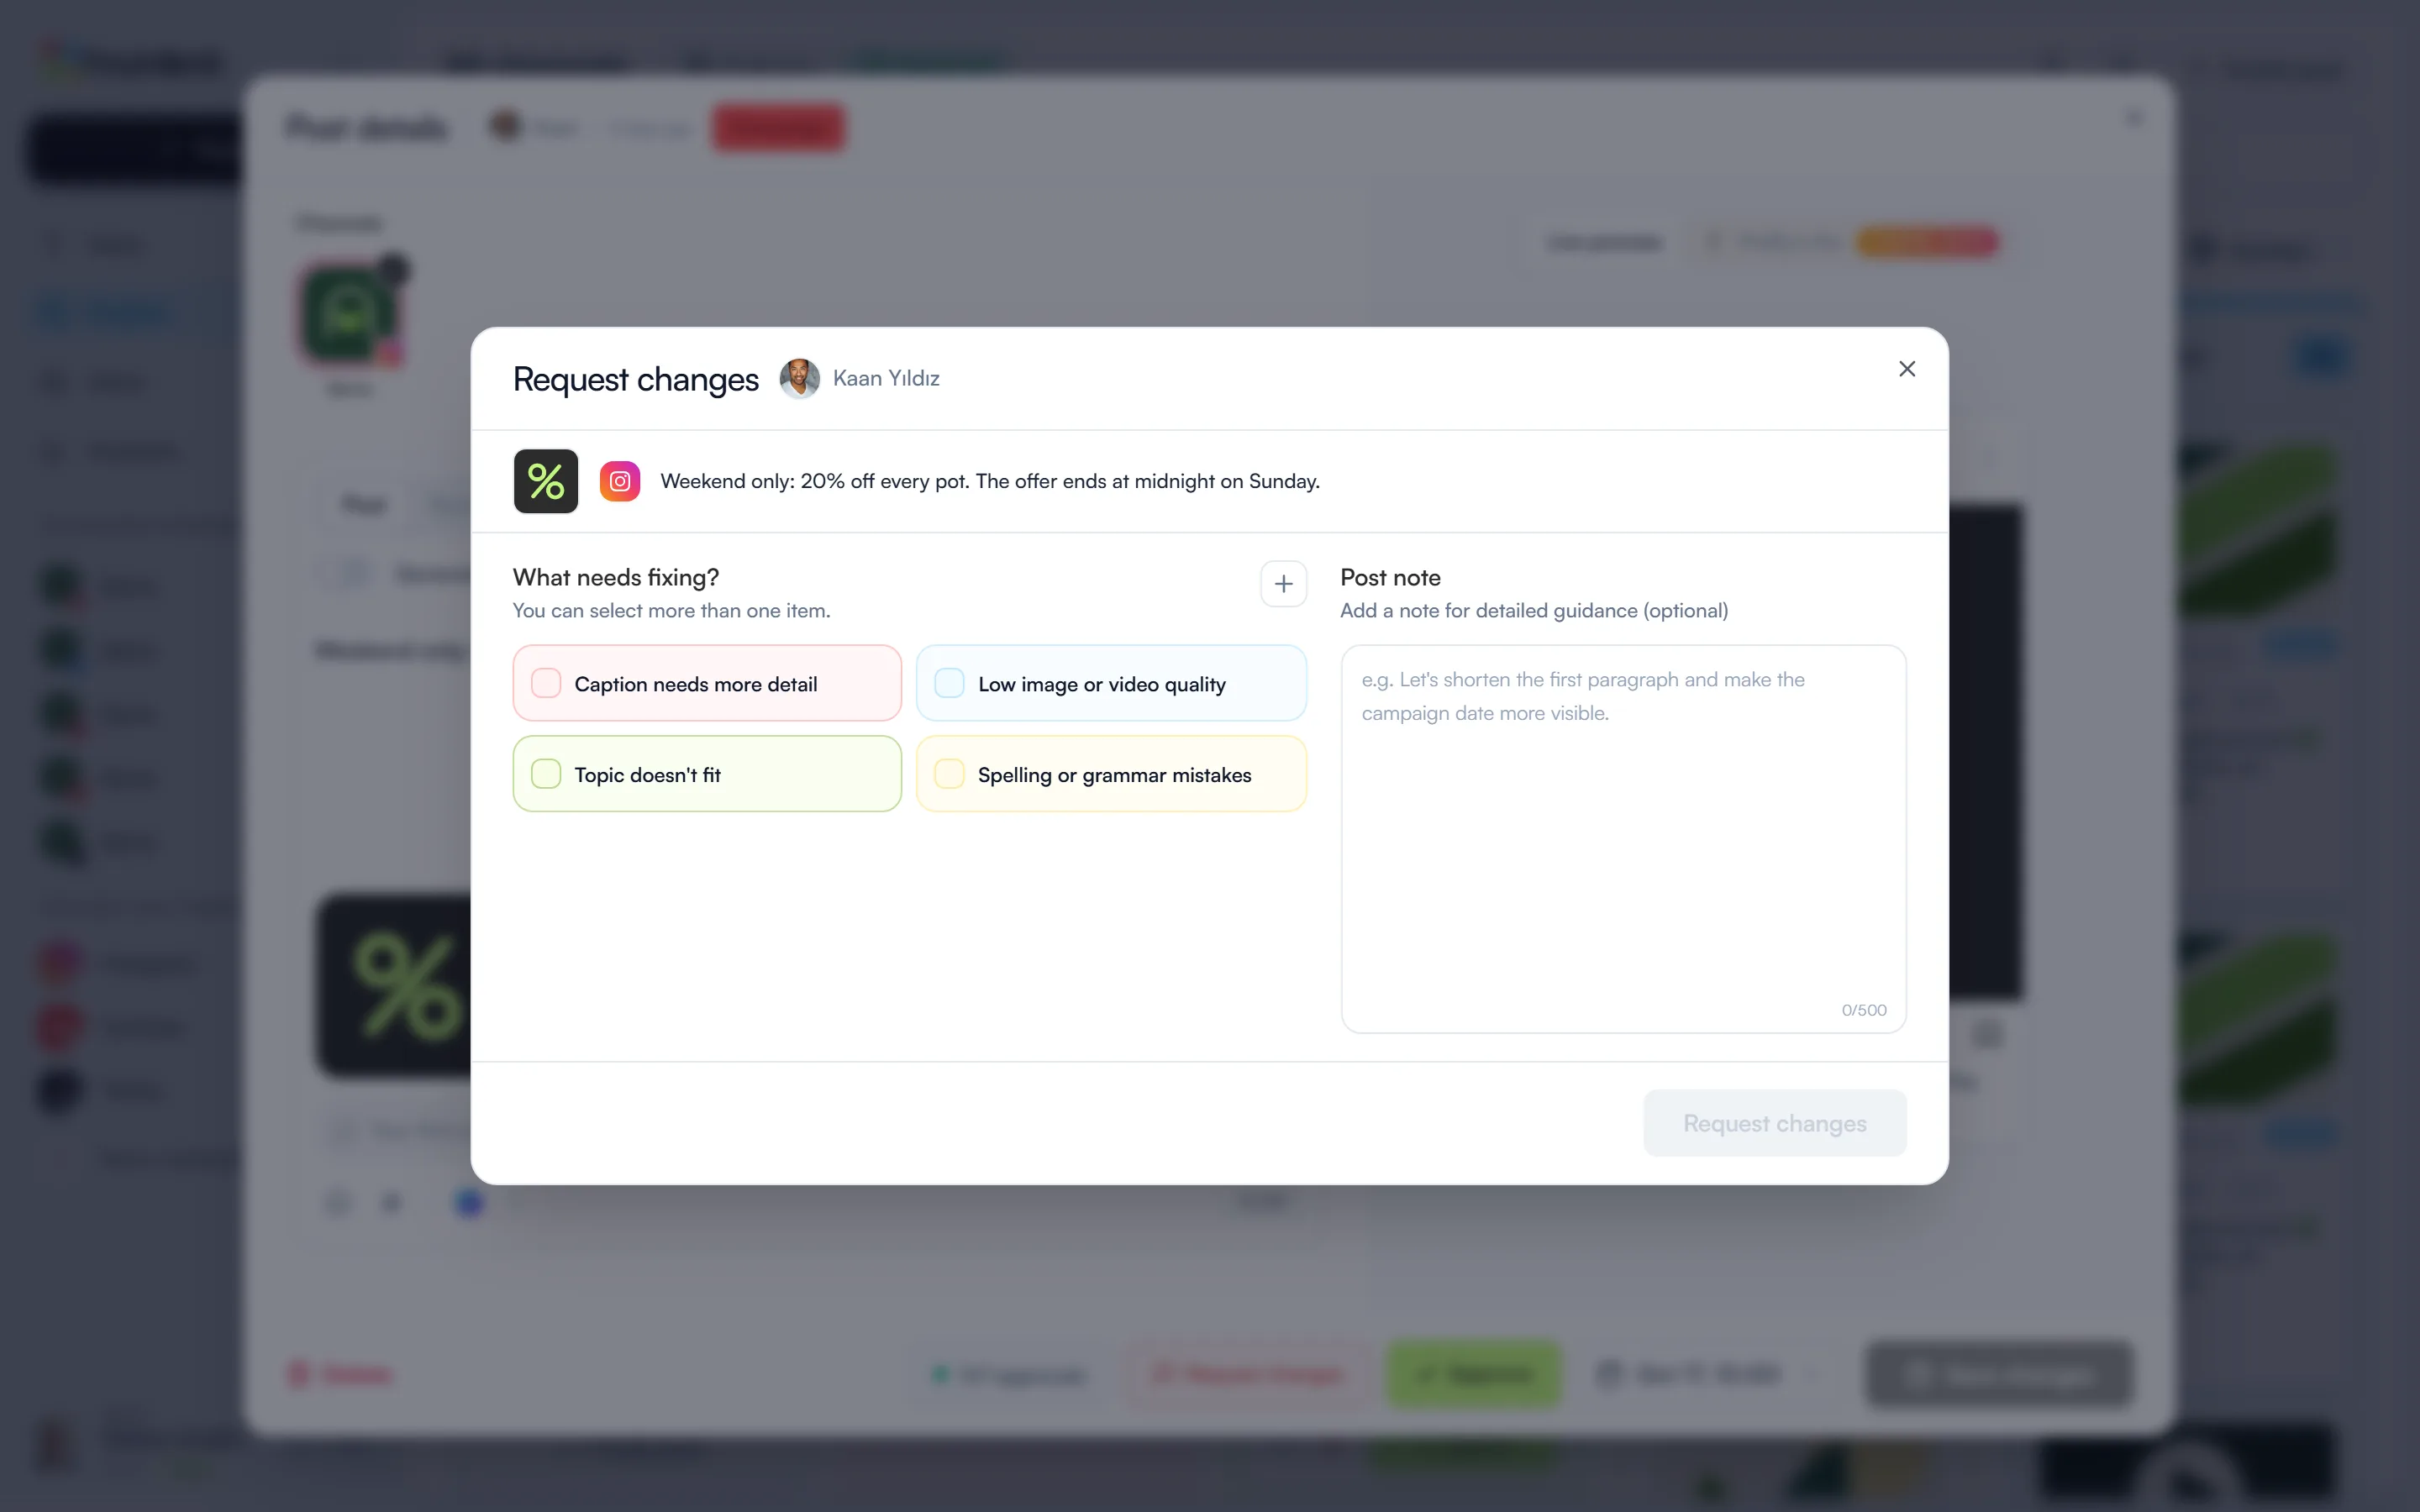
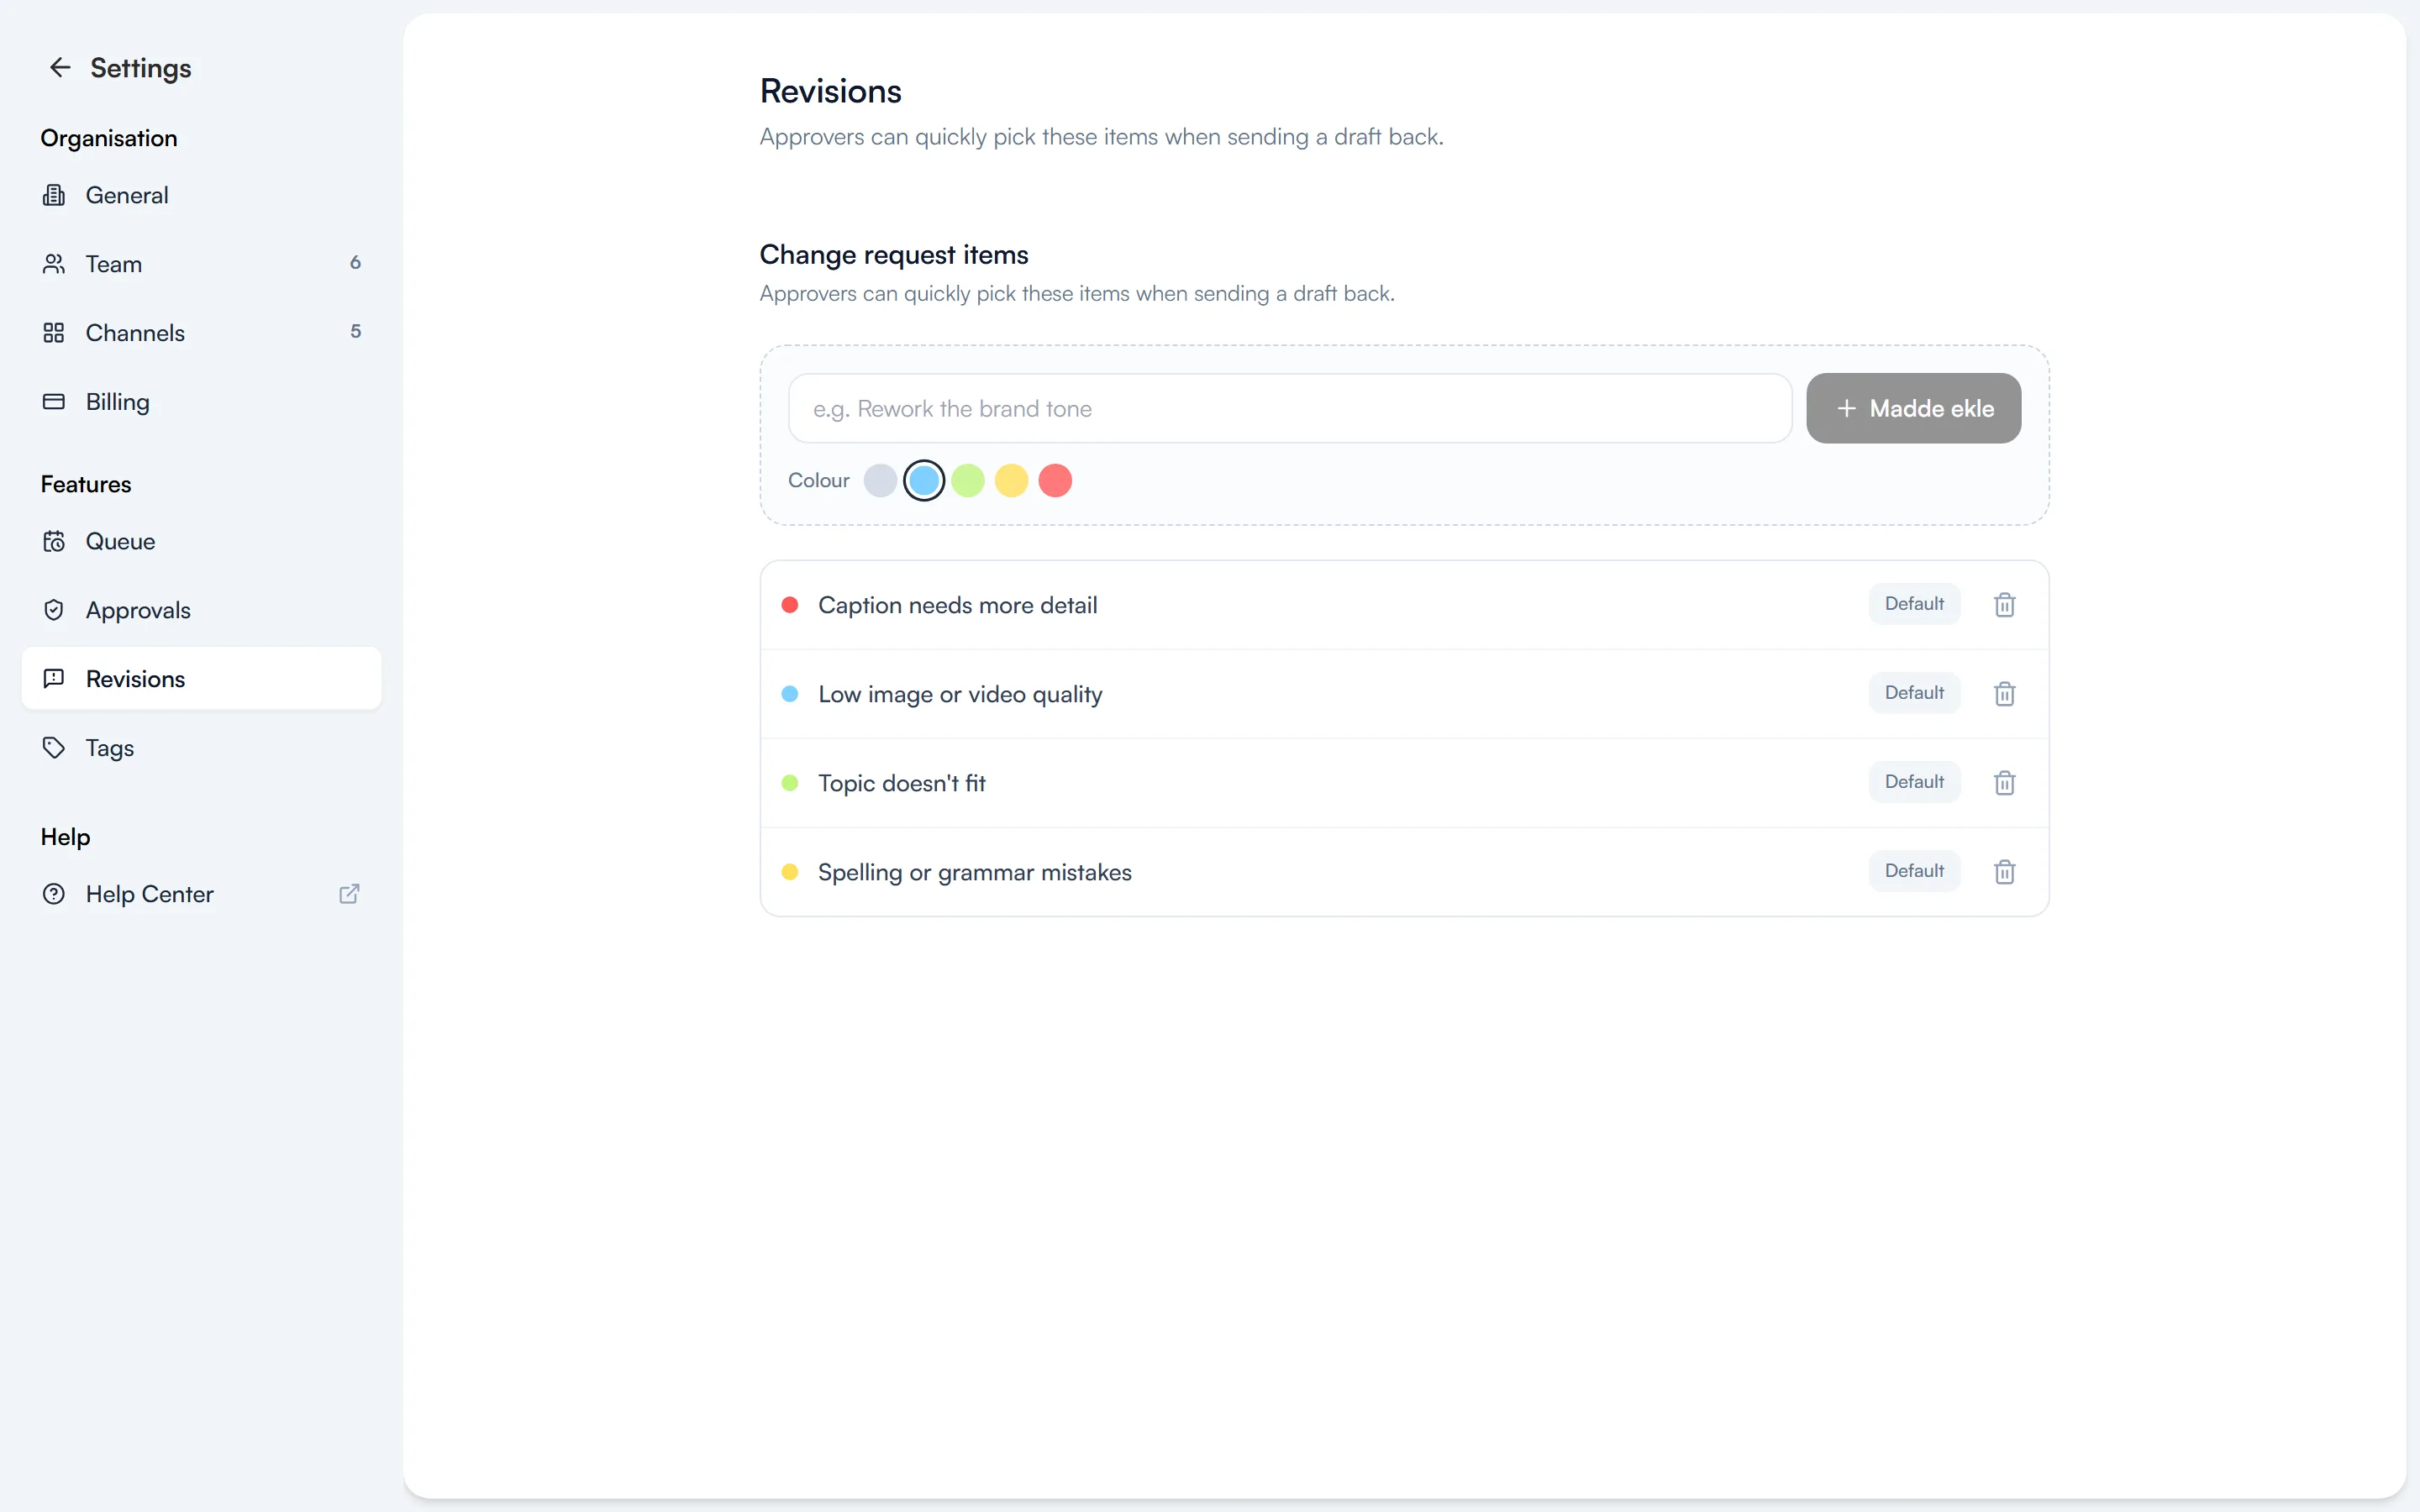
You manage the items in this window under Settings → Revisions. Every workspace starts with four ready-made items, and you can add your own, each with a colour.
What happens after approval
Once a post has the required number of approvals, it moves to the In queue column and publishes at its scheduled time. If it needs another look before then, use “Send back for approval” on the card to move it back to In approval.